
Coffee is more than just a morning ritual—it’s an art. Among many brewing methods, the V60 pour-over stands out for its simplicity and control. It transforms coffee brewing into a mindful experience, bringing out complex flavors for a cup that feels like a warm hug in a mug. Whether you’re a beginner or a seasoned enthusiast, mastering the V60 unlocks a new world of flavor. Grab your V60 and let’s dive into the steps to brew the perfect cup.
What Makes the V60 So Special?
The V60 is more than just a trendy coffee gadget. The cone-shaped dripper, with its spiral ridges and a single large hole at the bottom, allows water to flow evenly through the grounds, extracting the coffee’s essential flavors without over-extracting. The result? A cup that is clean, crisp, and full of bright notes that reflect the true character of the beans. Unlike other methods, it gives you the power to tweak each brew to your preference.
The V60 is perfect for those who appreciate a slow, immersive brewing process that allows them to savor each step.
Tools You’ll Need
Before we dive into the brewing magic, let’s gather your tools:
- V60 Dripper (Ceramic, glass, or plastic—pick your favorite)
- Paper Filters (You can go for bleached or unbleached, depending on your preference)
- Freshly Ground Coffee (The grind should be medium—think of the texture of sea salt)
- Hot Water (Around 200°F / 93°C is the sweet spot)
- Gooseneck Kettle (For precise pouring control)
- Coffee Scale (For accuracy, consistency is key)
- Timer (To keep track of your brewing time)
Step-by-Step V60 Pour-Over Brewing Recipe
Ready to brew? Let’s get started with a simple, yet incredibly effective recipe. Follow these steps to brew coffee that’s so good, you’ll want to drink it slowly, savoring every sip.
Step 1: Prep Your Equipment
Place your V60 dripper on top of your mug or server and insert the paper filter. This is your first chance to enhance the experience—pour hot water through the filter to rinse away any paper residue and preheat your dripper. Discard the rinse water, and you’re ready to go!
Step 2: Measure Your Coffee
Precision is key, so grab your coffee scale. A great starting point is a 1:16 ratio—this means for every gram of coffee, you’ll use 16 grams of water. For a single cup of coffee, try 20 grams of coffee for 320 grams of water. Adjust this ratio if you prefer your coffee stronger or lighter.
Step 3: Grind the Coffee
Grind your coffee to a medium consistency. Too fine, and the water will have a hard time passing through the grounds (leading to over-extraction). Too coarse, and the coffee will be under-extracted and taste weak. Aim for a grind that resembles sea salt.
Step 4: Boil and Rest the Water
Bring your water to a boil, then let it rest for about 30 seconds to reach 200°F (93°C). This sweet spot ensures you’re extracting the best flavors from the coffee without making it bitter.
Step 5: Bloom the Coffee Grounds
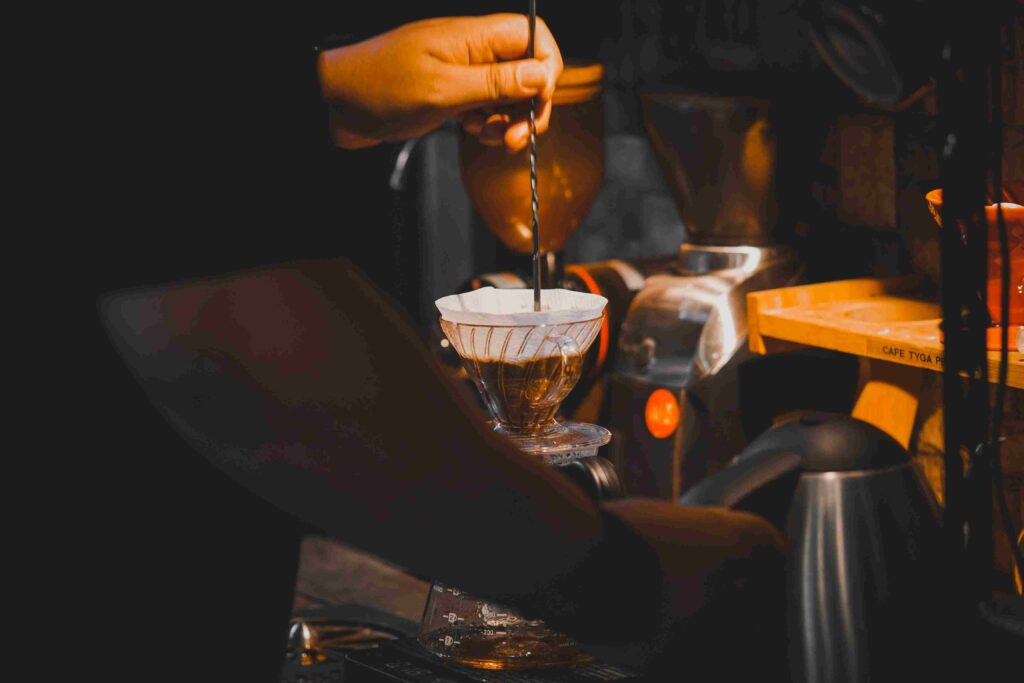
Place the ground coffee into the filter and give it a gentle shake to level the bed of grounds. Start your timer and pour a small amount of water (about 40-60 grams) in a circular motion, just enough to saturate all the grounds. Let the coffee bloom for 30 seconds—this process releases CO2 from the beans and prepares them for extraction, ensuring a smooth, clean cup.
Step 6: Continue Pouring
After the bloom, slowly pour in the rest of your hot water, again in a spiral motion, starting from the center and moving outward. Pour in stages, adding around 100 grams of water at a time. Wait for the water to drain before adding more. The pouring technique should be steady and controlled—think of it like writing a slow, swirling poem with your kettle.
Step 7: Let It Drip
After the final pour, let the coffee drip through completely. You should aim for a total brew time of around 2.5 to 3 minutes, but feel free to adjust depending on your grind size and water flow. This is your opportunity to adjust and perfect your technique.
Step 8: Enjoy the Results
Once the last drip has fallen, it’s time to savor your brew. Remove the V60, dispose of the grounds, and pour yourself a cup of liquid perfection. Whether you’re enjoying it alone or sharing with a friend, every sip should reflect the effort and care you put into crafting your perfect cup.
Bonus Tips for a Better Brew
- Freshness is Key: Always use fresh, high-quality coffee beans. Freshly ground coffee makes a huge difference in flavor.
- Play with Variables: The beauty of the V60 lies in its flexibility. Adjust the grind size, water temperature, and pouring technique to suit your taste.
- Take Your Time: Pour-over brewing is a slow, deliberate process. Enjoy it! The more attention you pay to each step, the more rewarding the outcome.
- Experiment with Beans: Light roasts bring out fruity, floral notes, while medium and dark roasts yield richer, chocolatey flavors. Have fun exploring different beans!
Mastering the V60 pour-over method is a journey, not a destination. It’s all about experimenting, refining, and finding what works best for your taste. Whether you’re brewing for one or sharing a pot with friends, the V60 gives you the power to create a cup of coffee that feels like an experience—a mindful moment of indulgence that elevates your everyday routine. So next time you reach for that bag of beans, take a few extra minutes and try the V60. Your taste buds will thank you.
Discover other brewing methods in our guide – Mastering the Art of Coffee Brewing: A Guide to Popular Brewing Methods.